Warning: This is an image-heavy post. You've been forewarned!
Why block? You want the lace garment you slaved to create shown off to best advantage, don't you? The process of creating lace - the increasing, decreasing, & general contortioning of yarn into frilly, holey, fluffy goodness - results in a less-than perfect fabric full of stresses and puckers and needs some, well, discipline. Blocking stretches out the fabric, allowing the laciness to flaunt itself, opening up bunched bits, flattening out unwanted pooches, and setting a pleasing shape and drape. Wet-blocking in particular does this with authority. And you'll need to do it after every wash of your lace garment, to prod it back into shape. And here's how I did it without breaking the bank.
I needed to block my first lace project, In a Theater Darkly, a stole I knit in Noro Kureyon Sock yarn earlier this year. As a gadget freak, my first inclination was to splurge on fancy shmancy blocking wires (I favor these from HandWorks Northwest) and a set of foam blocking mats. But as a poor person, the $45 + $80 (respectively) + shipping that these tools would have set me back nixed that idea. I thought about purchasing the budget versions available from KnitPicks (blocking wires and mats for $20 each, plus shipping), but although $50 is better than $140, I thought I could do better than that.
So I headed to my friendly, local thrift store, the Companion Animal Foundation, and there, for a measly $5, I found a set of kids' interlocking alphabet play mats!
Why block? You want the lace garment you slaved to create shown off to best advantage, don't you? The process of creating lace - the increasing, decreasing, & general contortioning of yarn into frilly, holey, fluffy goodness - results in a less-than perfect fabric full of stresses and puckers and needs some, well, discipline. Blocking stretches out the fabric, allowing the laciness to flaunt itself, opening up bunched bits, flattening out unwanted pooches, and setting a pleasing shape and drape. Wet-blocking in particular does this with authority. And you'll need to do it after every wash of your lace garment, to prod it back into shape. And here's how I did it without breaking the bank.
I needed to block my first lace project, In a Theater Darkly, a stole I knit in Noro Kureyon Sock yarn earlier this year. As a gadget freak, my first inclination was to splurge on fancy shmancy blocking wires (I favor these from HandWorks Northwest) and a set of foam blocking mats. But as a poor person, the $45 + $80 (respectively) + shipping that these tools would have set me back nixed that idea. I thought about purchasing the budget versions available from KnitPicks (blocking wires and mats for $20 each, plus shipping), but although $50 is better than $140, I thought I could do better than that.
So I headed to my friendly, local thrift store, the Companion Animal Foundation, and there, for a measly $5, I found a set of kids' interlocking alphabet play mats!

There are 36 12.5"x12.5"x0.25" mats in my set, giving me a whopping 432 sq. ft. of blocking potential! Although the tiles are a bit thin at 1/4", with that many it isn't a problem to stack them to get a thicker surface to pin to. The letters & numbers may fall out inconveniently at times, but the price was right. I may duct tape them together on one side to combat that tendency, but they work fine as is, too, once you get them laid out.
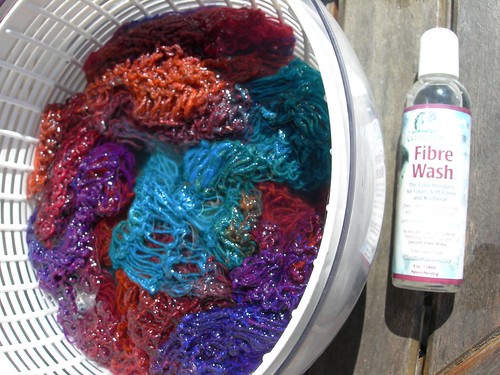
Now that I have a water-friendly surface on which to lay out my lace once it's ready, I can get down to business. I started by soaking my lace scarf in warm water with a tiny bit of Unicorn Fibre Wash (water slippery? you've added too much, so dilute it) for 15 minutes in prep for a wet-blocking. The soak/wash process softens the wool & takes out any dirt inherent in the yarn or soiling that occurred during knitting. (We may love us some Noro, but we know that it often has a bit of 'the farm' left in it.) But don't forget: agitation + heat = felted lace stole, so don't handle your wet fabric more than you must.
After soaking, I carefully gathered up the wet lace (in order to avoid damaging the wet - and therefore fragile - fabric) and spun out most of the water in my salad spinner; you could roll it in a towel instead if you don't already have a spinner dedicated to fiber play. You want your lace to be somewhere between dripping & damp; I trust your judgement.
After soaking, I carefully gathered up the wet lace (in order to avoid damaging the wet - and therefore fragile - fabric) and spun out most of the water in my salad spinner; you could roll it in a towel instead if you don't already have a spinner dedicated to fiber play. You want your lace to be somewhere between dripping & damp; I trust your judgement.
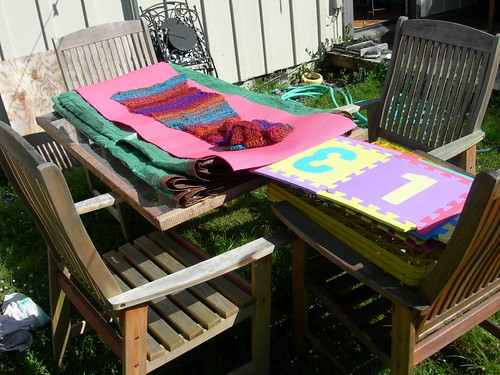
Next, I lay out the wet lace on my blocking 'table'. In this case, it is comprised of a combination of my mesh fleece sorting rack & a couple of drying racks atop our backyard garden furniture. I didn't want to get lanolin on the back of my foam, so I placed a tarp between the sorting rack & the foam yoga mat that was lying around (I tried using that to block the whole thing, but it wasn't long enough, hence the need for blocking mats.) This set-up might not be particularly elegant, but it worked!
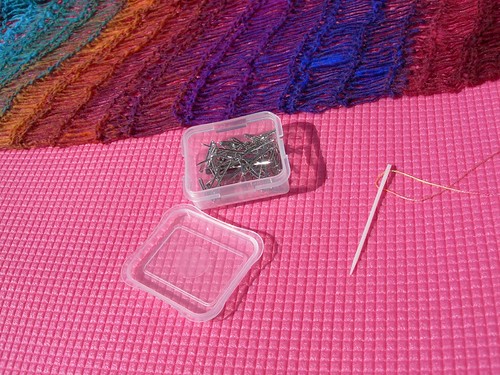
Now to ready the stole. Since I'm not using blocking wires to stretch out the lace, I will be substituting yarn for holding the stole taught. Use a length (a very l o n g length, longer than the length of the piece you are blocking) of smooth yarn, so it slips through easily; I had a cone of 12/2 rayon weaving yarn sitting on my desk & grabbed that, but crochet cotton or another slick yarn will work fine.
You'll also need a darning needle; I have a plastic one that came with my i-cord spool knitter that was perfect. Thread the yarn along each straight side of your piece; be sure to catch all the stitches, or you'll get a point blocked where you missed (ask me how I know). My stole is rectangular in shape, so all 4 sides got the string treatment; if you are blocking a traditional triangular shawl, you'll want to thread the top (straight) edge, and only do the other two sides of the triangle if they are also straight - scalloped edges will just be pinned at the points.
You'll also need a darning needle; I have a plastic one that came with my i-cord spool knitter that was perfect. Thread the yarn along each straight side of your piece; be sure to catch all the stitches, or you'll get a point blocked where you missed (ask me how I know). My stole is rectangular in shape, so all 4 sides got the string treatment; if you are blocking a traditional triangular shawl, you'll want to thread the top (straight) edge, and only do the other two sides of the triangle if they are also straight - scalloped edges will just be pinned at the points.
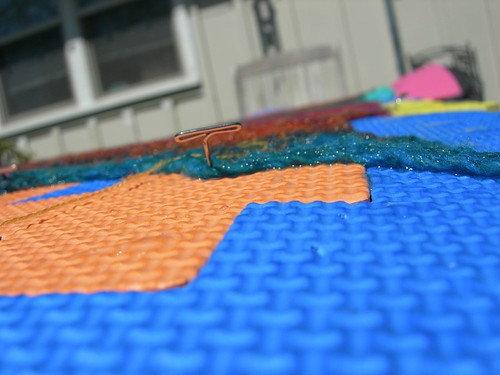
Once you've got your yarn threaded through your piece, it's time to pin it out. You'll need a butt-load of pins (that's the technical lace-knitter's term for lots of pins). I have some 2-pronged Clover quilting pins, but they are freakin' expensive (I bought 'em 'cuz they were pretty) and quilters T-pins work just fine. They are stainless steel so they won't rust, & they are relatively affordable (I got a box of 35 Dritz 1.5" pins for about $3.50 at my local fabric shop). Get more than you'll think you need.
Make a loop at one end of your yarn and tie it around a pin, then pull it taught at the other end and secure pins at both ends. Put pins at intervals along the yarn to hold the side straight. Do this for as many sides as you have yarn threaded through, then pin out any points you may have. You might consider measuring (use a T-square if you have one) to be sure that your sides are of even lengths. I didn't bother to do that here, just relied on the tried-and-true 'eyeballing' method.
Make a loop at one end of your yarn and tie it around a pin, then pull it taught at the other end and secure pins at both ends. Put pins at intervals along the yarn to hold the side straight. Do this for as many sides as you have yarn threaded through, then pin out any points you may have. You might consider measuring (use a T-square if you have one) to be sure that your sides are of even lengths. I didn't bother to do that here, just relied on the tried-and-true 'eyeballing' method.
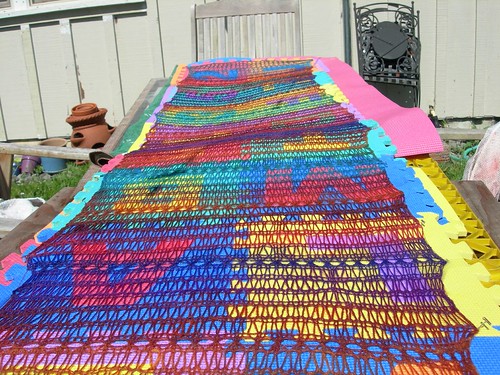
Your lace WILL grow during the blocking process; mine went from 83" to 90" long, & grew width-wise as well. Whatever shape you create here is the shape that your piece will have 'til its next blocking, so use care. Pins in each corner (3 for a triangle, 4 for a square or rectangle, & 4 - 1 at each compass point - for circles) will determine the final shape.
I wasn't able to get the string as tight as I would have liked, leaving some points along the sides as you can see, and I missed threading the yarn through a few stitches too (you can see that on the lower left side above), which also results in a less-than-straight side, but I fudged it and called it good. Had it been a fancy-pants swallowtail shawl, I would probably have been more persnickety about the whole thing, but figured this was fine for my stole and my first effort.
I also took so long threading the yarn through that my stole had dried out while waiting to be pinned, so I thoroughly wet it again using the garden hose. Very low-tech.
I wasn't able to get the string as tight as I would have liked, leaving some points along the sides as you can see, and I missed threading the yarn through a few stitches too (you can see that on the lower left side above), which also results in a less-than-straight side, but I fudged it and called it good. Had it been a fancy-pants swallowtail shawl, I would probably have been more persnickety about the whole thing, but figured this was fine for my stole and my first effort.
I also took so long threading the yarn through that my stole had dried out while waiting to be pinned, so I thoroughly wet it again using the garden hose. Very low-tech.
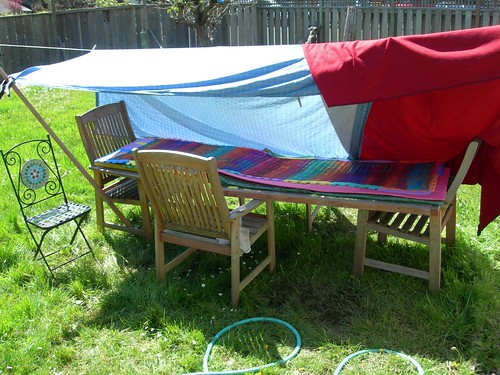
And now we're drying! You want to WALK AWAY from your blocking lace at this point; it needs to remain undisturbed until completely dry.
I Macguivered a tent over the wet stole to keep direct sunlight off it in an effort to avoid fading; I've read different accounts of how long it takes to suck the color out of wet wool, & wanted to be on the safe side. Outdoors in Northern California in Spring, my giant stole only took a few hours in a light breeze to dry. Indoors or in a different climate?; your mileage may vary.
I Macguivered a tent over the wet stole to keep direct sunlight off it in an effort to avoid fading; I've read different accounts of how long it takes to suck the color out of wet wool, & wanted to be on the safe side. Outdoors in Northern California in Spring, my giant stole only took a few hours in a light breeze to dry. Indoors or in a different climate?; your mileage may vary.

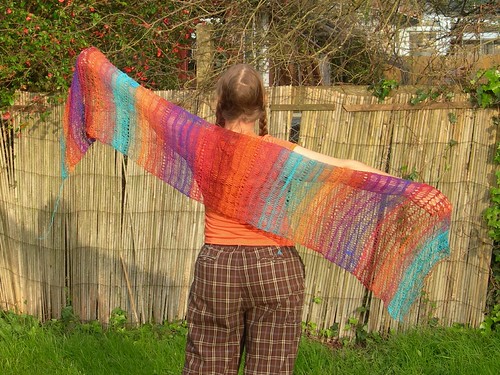
Ta-da! My $15 in yarn + $10 in blocking tools lace stole!
Tags: